Yesterday, I had plans to sleep in. Those plans fell apart quickly when my dad rushed into my bedroom stage-whispering, “Mikeala! What kind of frog is this?”
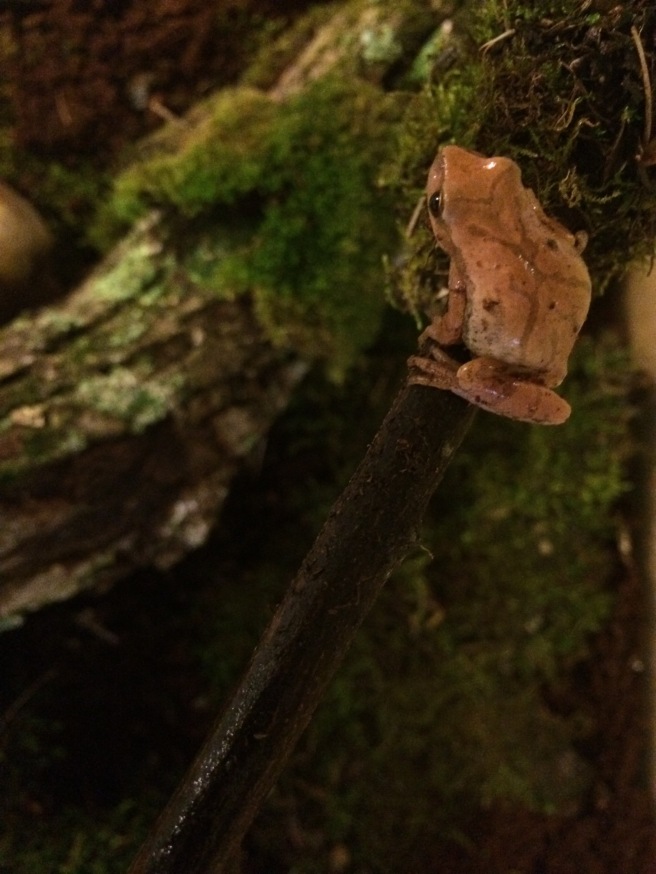
Of course, being the little nerd that I am, I groggily sprang out of bed and out the door to see a tiny brown frog perched neatly on the window. After going back inside to research him a bit, I found that he was a spring peeper, and apparently would make a lovely pet.
Of course, like any sensible person, I quickly grabbed a plastic jar, made the lid breathable, and coaxed the little guy inside. We named him Oliver.
Now, here comes the tricky part. Maybe you’re sitting there saying “I did that once when I was a kid and he died.”
Did you leave him in a jar?
Did you try to handle him often?
This, class, is why the small creatures that we try to claim pass so quickly. So gather round, because it’s time for a lesson in how to properly take in your own little frog, lizard, newt, or whatever you may be venturing out to domesticate.
First, you need a tank. Not just a tiny little tank. A ten gallon tank at the very least, because let’s face it, these guys have been out in the wild. They’re used to space. You’ll also need a screen lid for the top, to ensure oxygen without escape.
Secondly, you need filling for the bottom. Again, these guys have been out in the wild. You can’t just set them in a glass box and expect them to be happy and healthy. I personally recommend coconut fibers, because these help maintain the moisture levels that critters around these parts will need.
Thirdly, you need a water treatment. Now, you’re probably sitting there thinking, “water treatment? Can’t I just fill a bowl with water and set it in there?”
In short, no.
These animals aren’t used to our water, which has been spiked with chlorine and chlorites. It’s a severe shock to their system. A concentrated reptile water treatment will last you a lifetime, and make sure your new friend HAS a lifetime.
Next, you’ll need a bowl to put some of this reptile-safe water in. The bowl should be deep enough not to evaporate, and shallow enough that it won’t drown the little guy.
Lastly, you’ll need a spray bottle. Why, you ask? Because again, they’re used to humidity. You’ll need to spray your tank down with the dechlorinated water twice a day, every day.
So, what’s our budget looking like? Well, if you go to petsmart (which I did, because I am a wonderful employee and would never, ever shop elsewhere obviously), the prices are as follows.
10 gallon tank- $13
Screen lid- $11
Water treatment- $10
Coconut fiber filling for the bottom- $8

Not as cheap as you were expecting, huh? Without tax, just to take care of a tiny little frog, you’re looking at $42, and that’s without a water bowl and spray bottle which, thankfully, I already had.
Still willing to take in a new addition to the family? Alright. Now that we’ve got the basics, let’s look at how to set it up. While one person could certainly do this alone, backup is always fun, so I enlisted my friend and coworker, Kim.
First, we broke up the coconut fiber bricks so we could mix half of one with six cups of dechlorinated water.

You CAN get the coconut fiber already hydrated, but it’s much cheaper for a lot more if you make it yourself. It comes in a pack of three bricks, and half of a brick is more than enough to fill the bottom of your tank.
After that was done, we let it sit long enough to soak up the water, then spread it around, being sure to break up any clumps.
Next comes the fun part of traipsing around in the rain to find sticks for him to climb on, since he definitely needs and likes to climb, rocks for him to hide under, and moss to make it feel like home. After adding those, we set the water dish in and filled it up. The finished product looked pretty darn good, if I do say so myself.

 (you’ll notice little Oliver in the bottom right corner in the second picture. He burrows down into his dirt. It’s really quite a sight.)
So there you have it. For any reptile or amphibian you take in this spring, please remember they have needs, and if those needs aren’t met, you’re hurting rather than loving them. I was lucky. Oliver likes room-temperature conditions. Most frogs, turtles, etc. don’t, and would have required a $15 heat lamp as well.
All in all, after the initial expense, I’ll be looking at a few dollars a week to buy Oliver some baby crickets for a tasty meal, and not much more than the effort it takes to change his water, spray him down, and clean his tank once a month. A lovely little guy, and well worth it.
I do hope that if you were considering taking in a new addition to the family from the wild, this is an eye-opener to the money and responsibility involved, a good breakdown of how to do it, and a guide on what you need. Good luck this spring, with whatever your activities may be!